I recently completed a 3-day First Aid at Work course at Training 4 Logistics. It gave me hands-on training in CPR, using a defibrillator, and responding to a range of injuries and medical emergencies. I feel much more confident about stepping in and giving immediate support if something happens at work or elsewhere.
Here is how Day 1 went on my 3-day First Aid At Work Training Course….
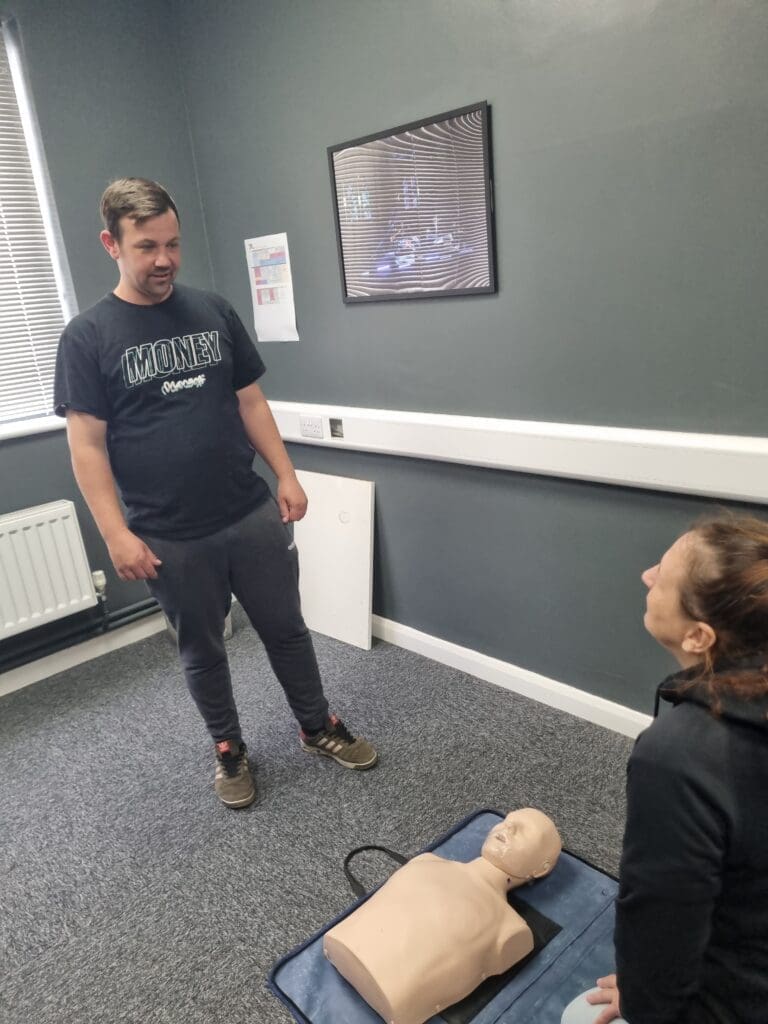
The alarm goes off early — training days start on time, and punctuality matters. By 8:30 a.m., I’m at the training centre with a group of strangers who will, by the end of the course, feel like teammates. Free coffee in hand from the onsite facilities, I collect my workbook, sign the register, and glance nervously at the people around the room.
The morning begins with introductions and icebreakers. Everyone is friendly and talkative, and we all settle into a quick rapport. But before long, we dive into the essentials:
Starting with a dynamic risk assessment, and when not to perform CPR.
CPR is not needed in cases where Livor Mortis (Blackening of the skin where the blood has settled), Rigor Mortis (The stiffening of all joints and muscles, which occurs a few hours after death) or Decapitation (when the head is separated from the body) is apparent.
A Dynamic Risk Assessment consists of:
What happened regarding the incident? Ask the casualty if they are conscious, and any witnesses
Number Of Casualties? Check how many people need medical attention
History To the Event: What happened before the incident? Ask the casualty if they are conscious and if there are any witnesses.
Casualty Medical History? Ask casualty if they are conscious of any medical requirement, asthma, epilepsy, etc…
Check signs and symptoms of casualty using the 3 Bs & 3 Ps
Breathing Preserve Life
Bleeding Prevent Worsening
Breaks/Burns Promote Recovery
We learnt about the Chain Of Survival:
Early recognition and call for help: check the casualty, assess and let emergency services know the casualty’s situation.
Start CPR
Get A Defibrillator to the casualty within 3 minutes to increase survival chances
Post resuscitation care: Keep your casualty calm by talking to them, and tell them emergency services are on the way.
We also learnt about DRSABC:
Danger: Check your surroundings, assess for any danger to you, the casualty or any bystanders.
Response: Check for a response from casualty, gently shake their shoulders and shout “Are you ok?”
Shout/Send for help.
Airway: Check inside the mouth and remove any obstruction. Open the airway by tilting the head and lifting the chin.
Breathing: Put your ear near their mouth, feel for breath on your cheek, look down their chest with your hand on their chest, listen for breathing sounds, watch and feel for the rise and fall of the chest for 10 seconds. (3-5 breaths in 10 seconds is good) Ring emergency services at this point. If not done already, alert them to the casualties’ status
C.P.R/ circulation. If the casualty is not breathing properly, start C.P.R. 30 compressions- 2 breaths.
If the casualty has been in a Non-Breathable Environment ( Fire, Gas, Water, Dirt)
Do 5 breaths – 30 compressions, then continue with normal CPR, get air back into the lungs before compressions.
For kids Newborn-8/18, give 5 breaths 1st then do 30 compressions – 2 breaths as normal C.P.R. Recommends.
Causes of Unconsciousness:
We were taught the FISH SHAPED method to learn these:
Fainting
Imbalance of temperature
Shock
Head injury
Stroke
Heart Attack
Asphyxia
Poisoning
Epilepsy
Diabetes
Lunchtime came around fast, and a few of us went to the local café just across the road from the Training Centre. The place was buzzing with office workers on their breaks, and we squeezed around a little table, still chatting about the morning’s practice and laughing at each other’s dramatic role-plays.
A couple of others headed further up to the bakery on the main road, about a five-minute walk away. They came back armed with paper bags of sandwiches and the kind of cakes that make you instantly regret not joining them. There was an easy camaraderie in the group already — it felt less like a class of strangers and more like a team sharing the same challenge.
As the lunch break ticked away, we headed back inside, joking that we’d need the CPR dummies to revive us after eating so much. The afternoon session promised more scenarios — bleeding, burns, and recovery positions — and I could already sense it was going to be just as hands-on as the morning.
We then learnt about seizures and their types:
Focal Seizure:
These derive from a specific part of the brain, sometimes called the Focus, the symptoms vary depending on the brain area affected and can include:
Motor Symptoms: Jerking movements of the face or body.
Sensory: These consist of hallucinations, unusual smells or tastes, tingling or feelings of fear.
Changes in awareness: difficulty responding or memory loss for the event.
Automatic movements: Repetitive actions like staring or lip smacking.
Tonic Clonic:
These types of seizure are characterised by two distinct phases…
The Tonic phase:
Stiffening of muscles… All the muscles in the body become rigid and stiff, which can cause the casualty to fall to the floor if they are standing.
Loss of consciousness… The casualty becomes unaware of their surroundings and will not remember what happens during this phase.
Possible crying out…. Air being pushed out past the voice box may cause a sound like a cry or a groan.
Clonic Phase:
Rhythmic Jerking.. The muscles start to contract and relax in a rhythmic jerking motion or convulsions.
Full Body Convulsions…. This jerking affects the whole body.
Loss Of Control…. There can also be a loss of control of the bladder and bowels during this phase.
The causality needs to go to A&E if:
The seizure lasts for 5 minutes or more
If they injure themselves during a seizure
If they have 2 or more seizures quickly after each other
The seizure happened in water
Or if it is their 1st seizure.
The last thing of Day 1 that we learnt was about burns, types of burns and treatments we started with the SCALD method.
Size – Size of the burn
Cause – What caused the burn, Electric, Acid, etc..
Age – Age of the patient
Location – Where on the body did the burn occur
Depth – How deep is the burn
Types Of Burn:
Superficial (First degree) burn
A burn to the top layer of skin, the epidermis, these cause the skin to look red, swollen and painful, but does not blister. They can take around 5- 10 days to heal and won’t scar.
Partial-Thickness (Second degree) burn
This is when the Epidermis and part of the Dermis (the layer beneath the top layer of skin) are damaged.
The skin becomes red, painful, may blister and can appear moist.
Healing can take around 3 weeks and can possibly leave some scarring
Full–Thickness (Third-degree) burn
All layers of the skin, including the epidermis and dermis, are damaged, entering the subcutaneous tissue.
The skin may appear white, leathery, waxy or blackened and is often painless due to the nerve endings being destroyed.
This type of burn requires immediate medical attention, and heavy scarring will occur.
Fourth-degree burns
These are life-threatening burns where the burn extends through all layers of skin and goes into deeper tissues such as muscles, tendons and bone.
The affected area will be stiff, blackened, and you may see muscles or tendons.
Medical attention is needed immediately. Do not apply creams or ice, do not remove clothing if possible, keep the burnt area elevated also if possible, keep the burnt area loosely covered with a clean bandage, clean sheet or clean blanket.
For the above burns, run cool water over the affected area for 20 minutes,
Remove any clothing, jewellery, and watches.
Cover with clean cling film.
Day 2
Another early start for me, coffee in hand from the fantastic onsite services — a habit that quickly became essential. Those machines and the little snack stand got used a lot over the three days, a quiet lifeline for tired trainees trying to wake up before the real work began.
The group already felt more comfortable together; the nervous introductions of yesterday were long gone.
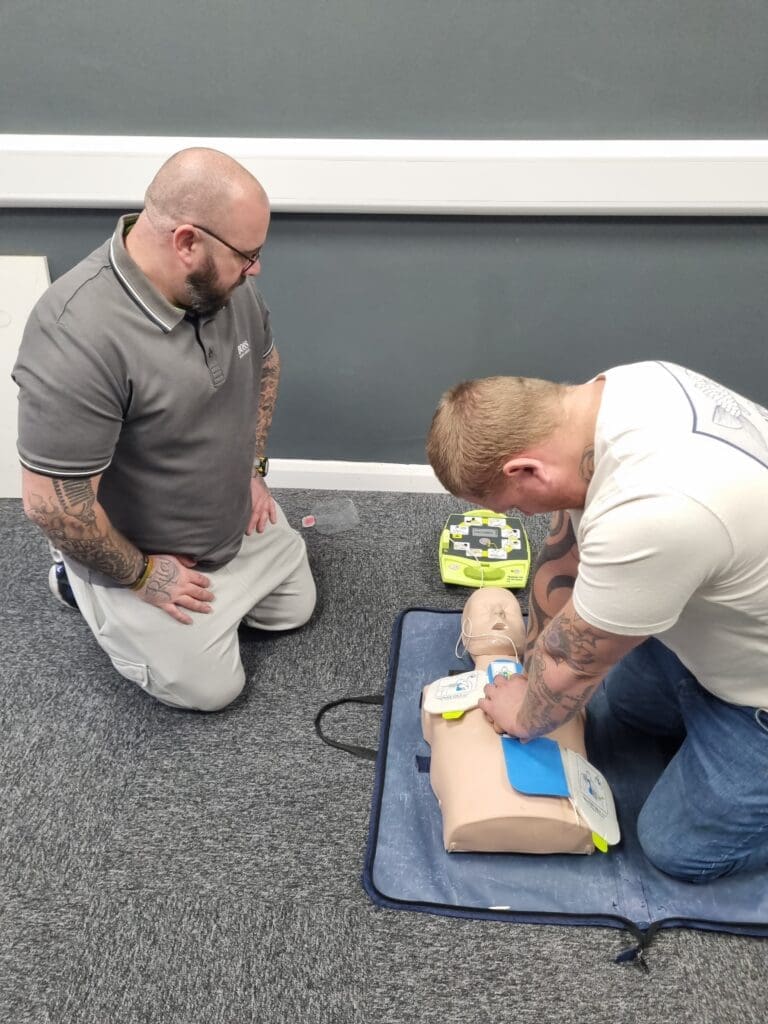
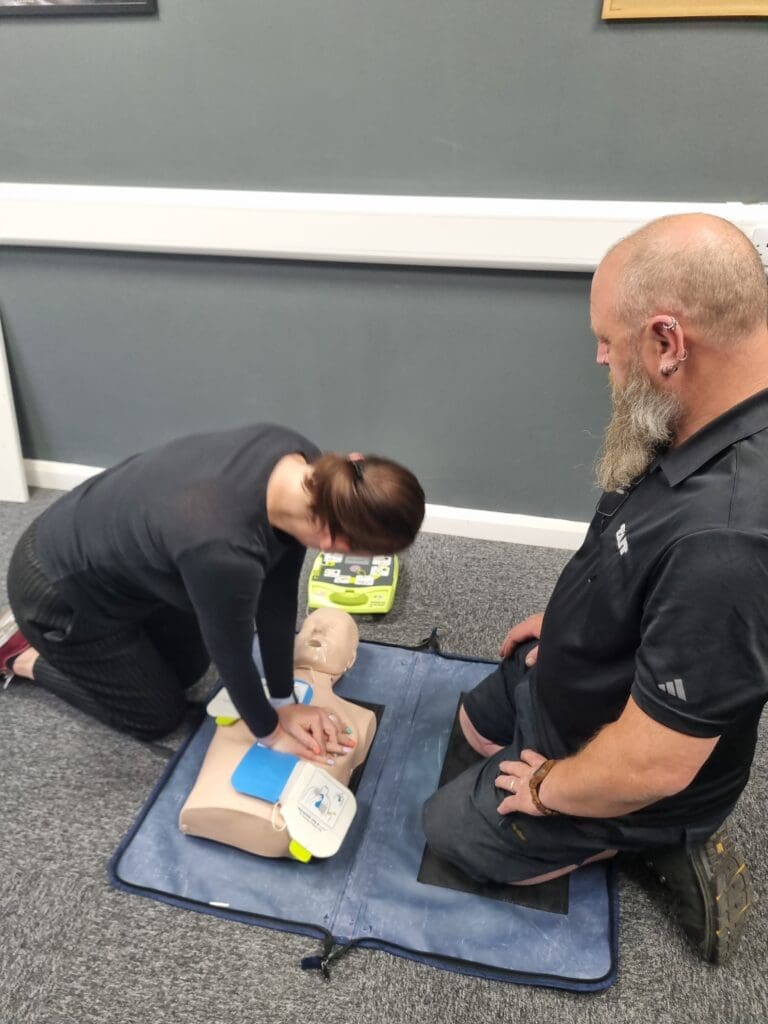
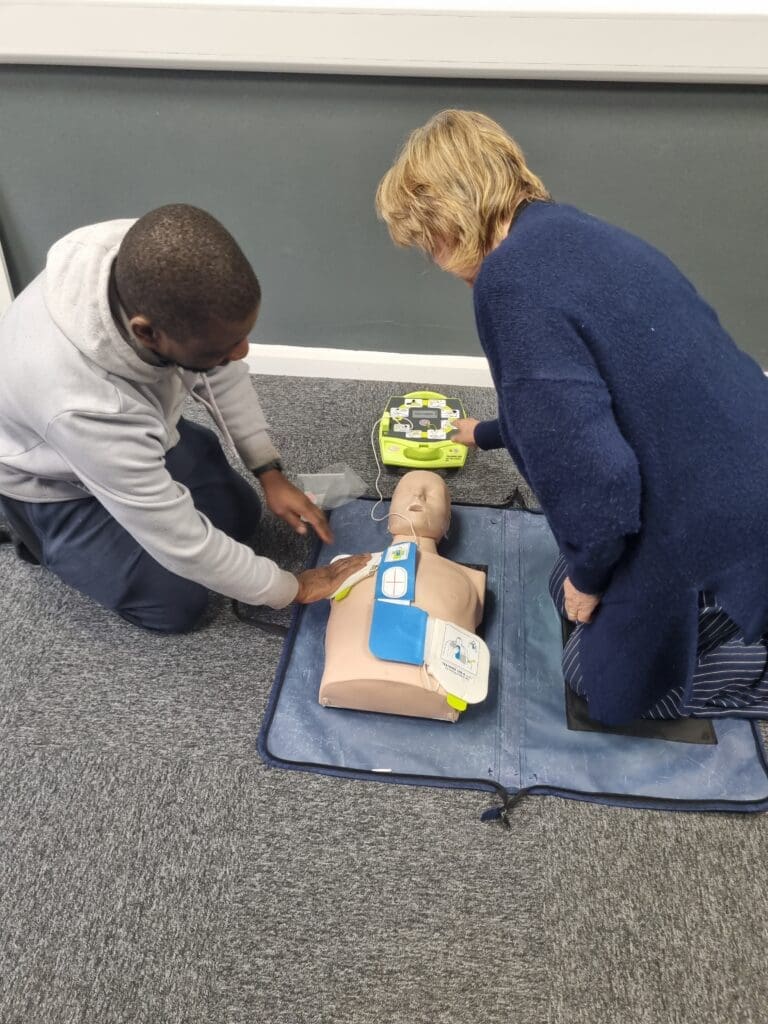
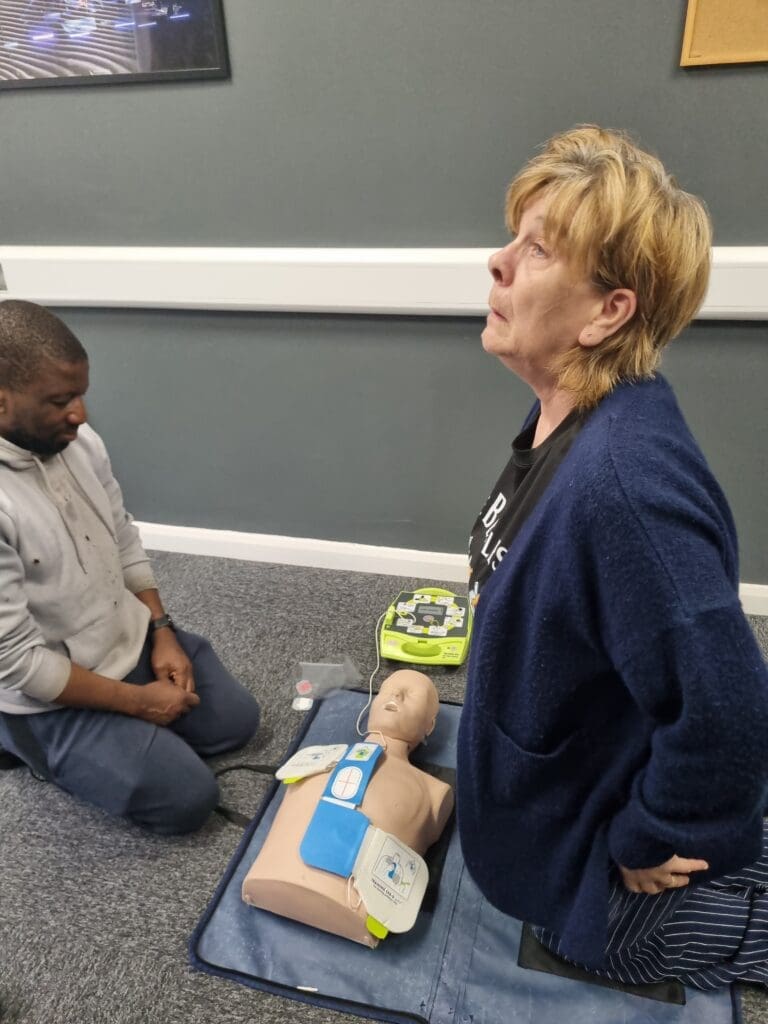
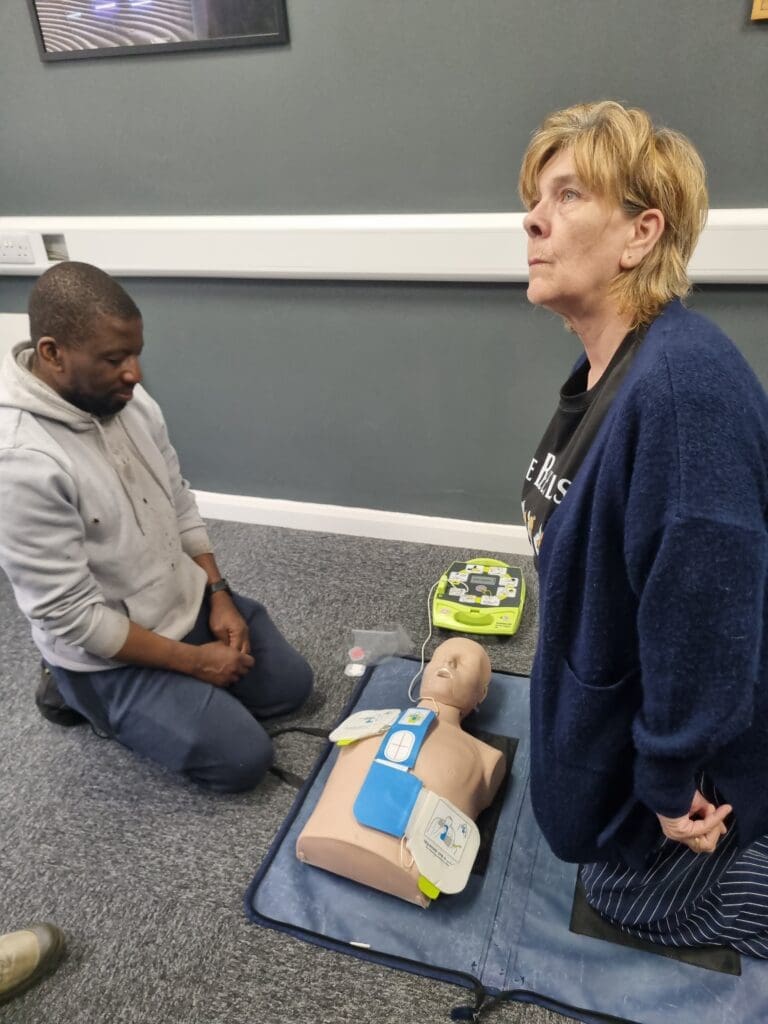
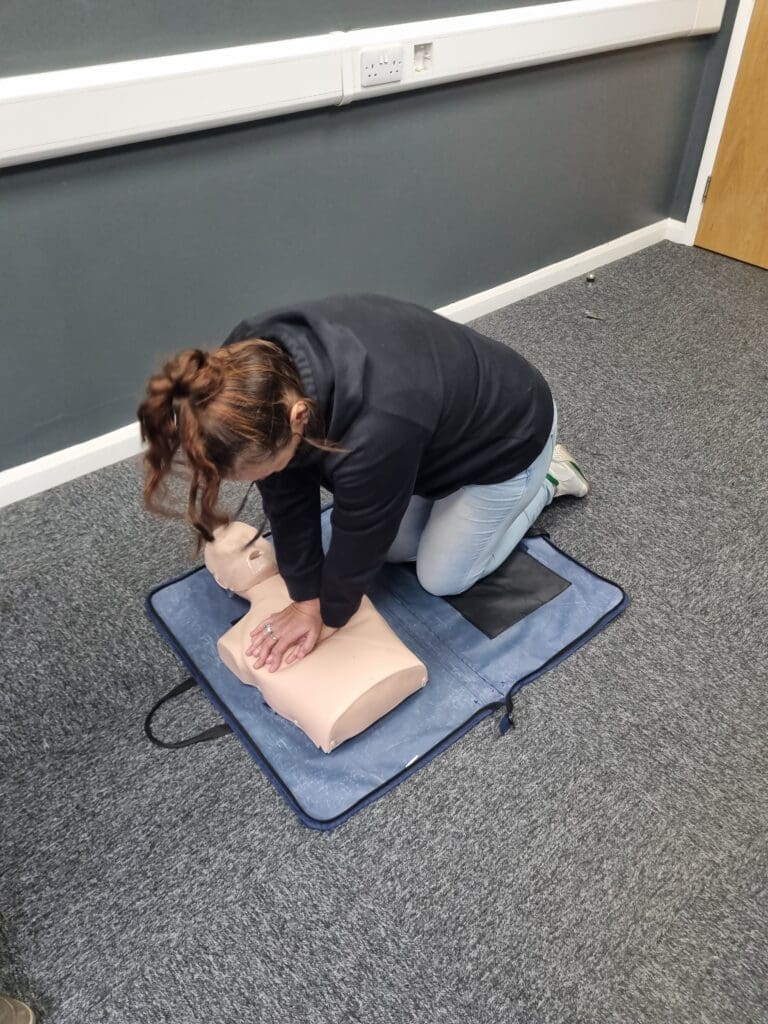
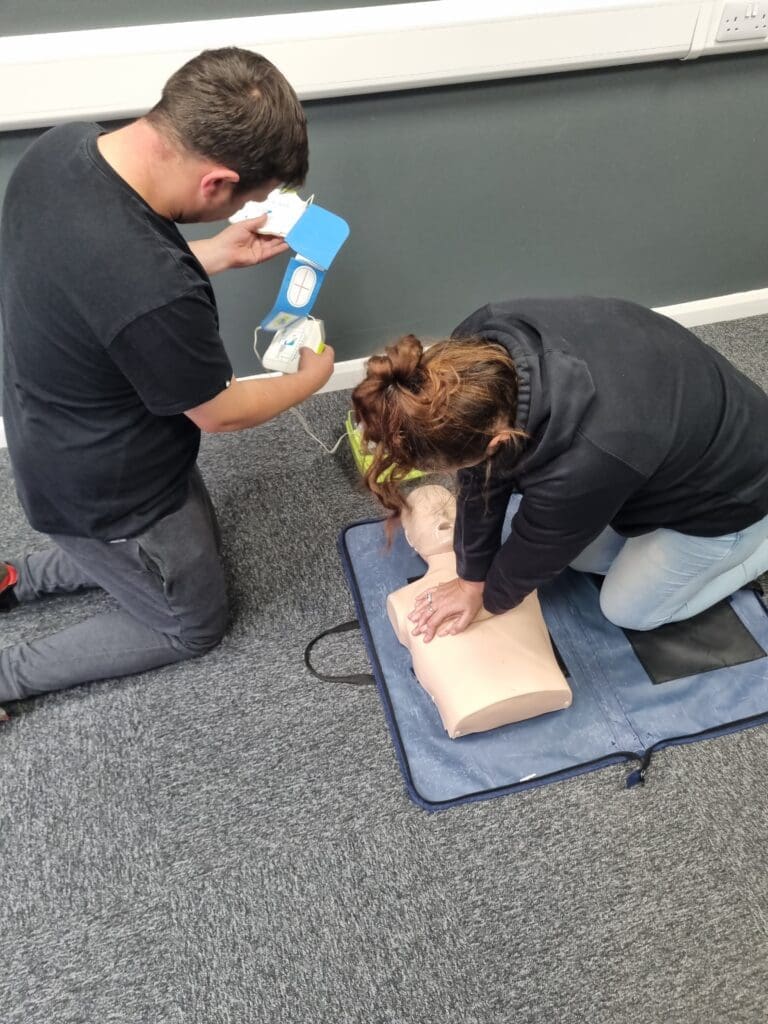
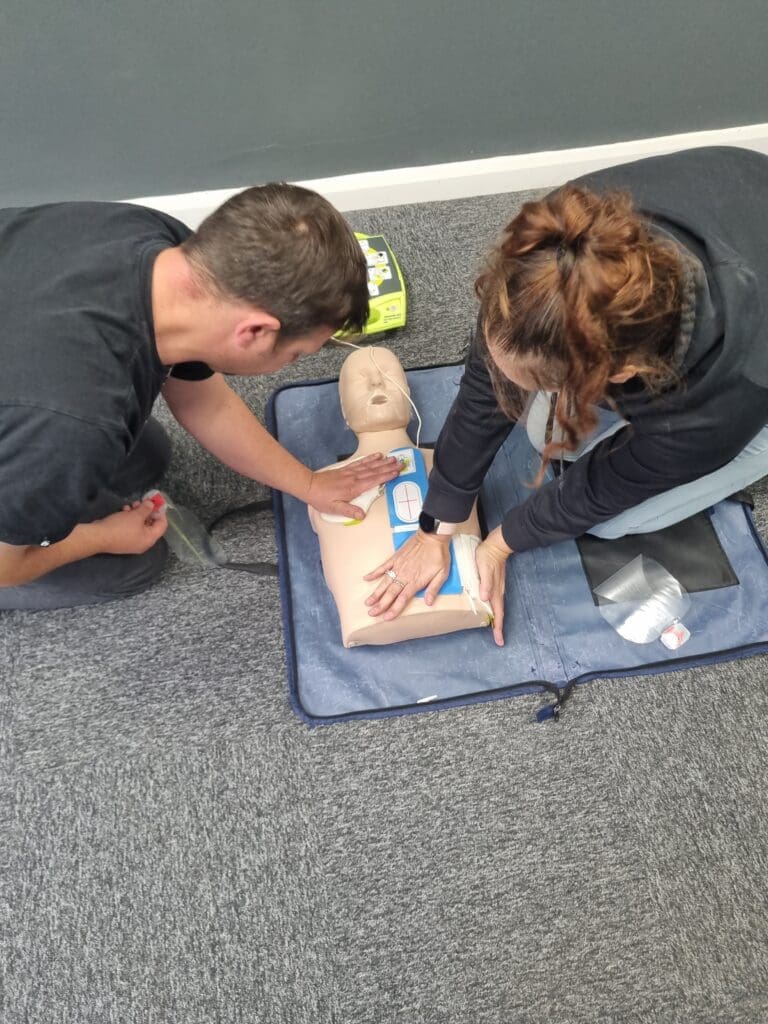
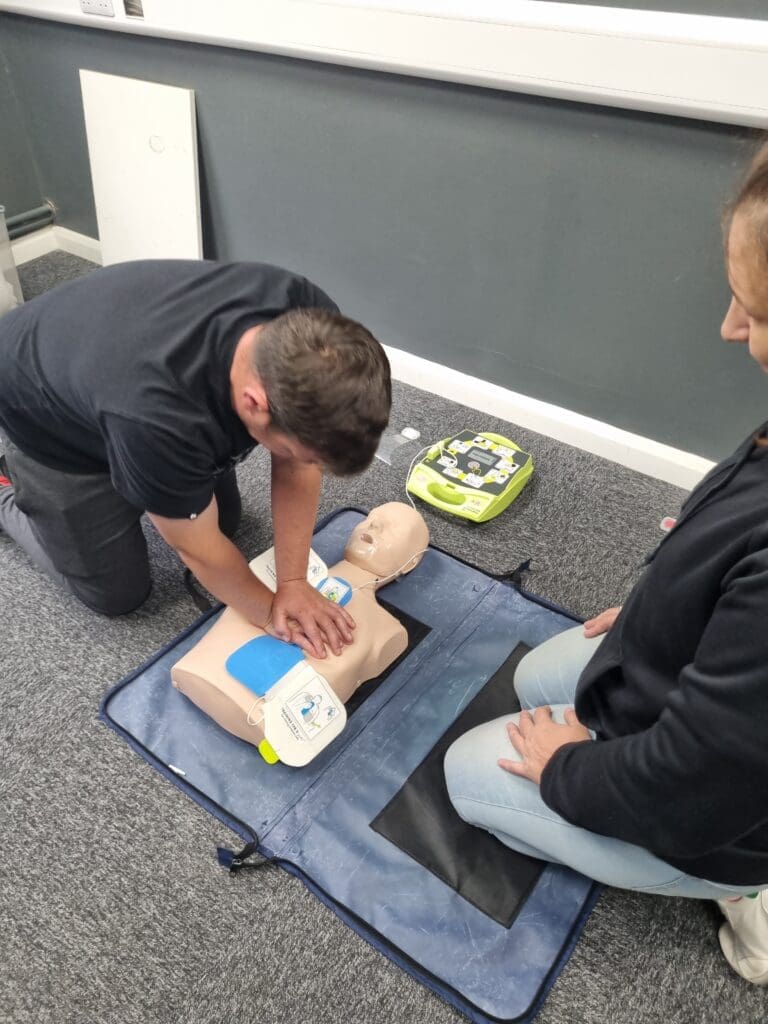
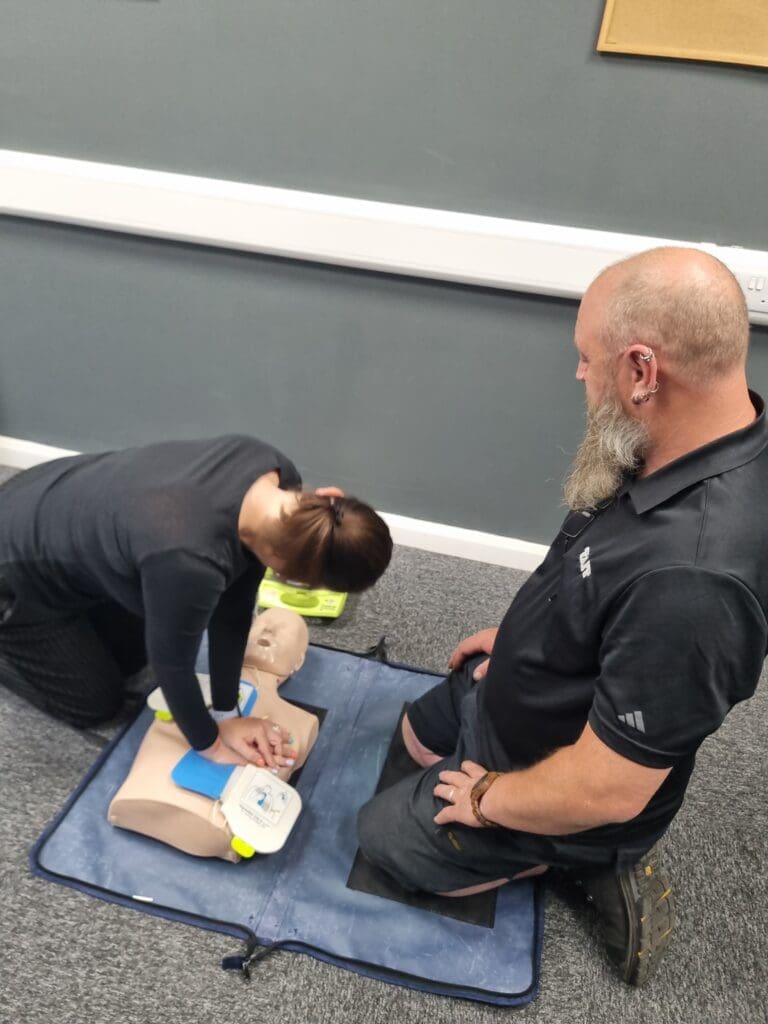
We practised doing CPR with an AED (Automatic External Defibrillator)
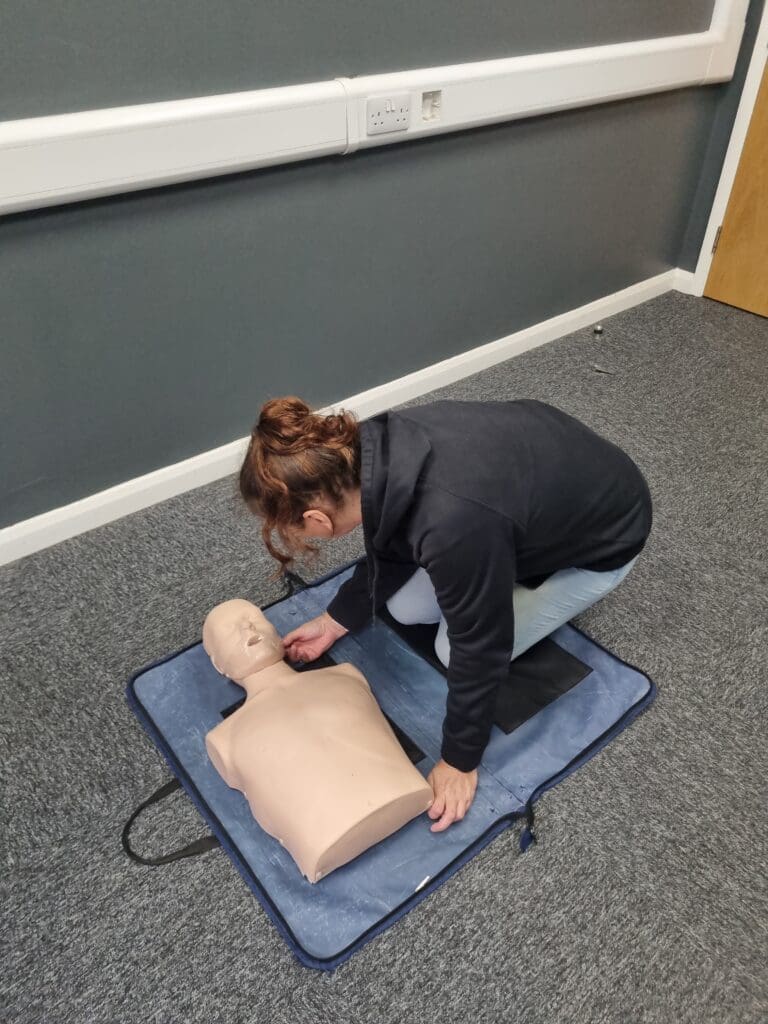
We pair up to practice. Kneeling on the mat beside a training mannequin feels strangely serious, even though I know it’s only a drill. I call out clearly, “Can you hear me? Can you open your eyes?” — my voice a little shaky at first. Then I tip the mannequin’s head back, check the airway, and watch for those all-important chest movements.
At first, it feels mechanical, like ticking boxes on a checklist. But as the trainer walks past, nodding and correcting, the process begins to sink in. This isn’t about rote learning — it’s about building the instincts to act fast when seconds count.
After a short break, we practice CPR. Thirty compressions, two rescue breaths, repeat. The rhythm is exhausting but strangely satisfying, and the trainer’s feedback sharpens my technique. “Push harder. Faster. That’s it.” I feel my confidence growing.
We had already watched a training video and worked in pairs to carry out a primary survey and a secondary survey using the SAMPLE method
Signs & Symptoms
Allergies
Medication (Insulin, EpiPen, Inhaler, etc)
Past medical history (Heart conditions, Epilepsy, Asthma, etc)
Last oral intake (Food or Drink)
Event History. What was the patient doing before collapse?
Check pupils:
Unequal, possible head injury
Both dilated, definite head injury
Feel carefully all of the below on the patient for damage
Head
Chest and Shoulders
Ribs, stomach, back and pelvis
Both legs, one at a time
Both arms, one at a time
Keep monitoring the patient’s Airway, Breathing, & Circulation
We then moved on to fractures, learning the different types (closed, open, complicated, and greenstick) and their signs and symptoms.
Closed fractures stay inside the skin
Open fractures come through the skin
Complicated Fractures are when ligaments, muscles or blood vessels get trapped between the bones.
The signs and symptoms of fractures are:
Pain
Unnatural movement
Swelling and bruising
Crepitus (sound of bones scraping together)
We also learned how to use slings correctly, the difference between strains and sprains, and how to treat them with the RICE method
Rest
Ice
Compression
Elevate
We covered chest trauma
Hemothorax: This is when blood collects into the space between the lung and chest wall, called the Pleural cavity.
Chest pain, difficulty breathing and rapid shallow breathing, Low blood pressure (Shock,) Rapid heart rate and restlessness and anxiety are signs of this.
A doctor would need to drain the blood, fluid or air from the cavity
Pneumothorax (Collapsed Lung): This is when air leaks into the space between the lung and chest wall, causing the lung to collapse partially or completely.
Sudden, sharp chest pain, especially with deep breaths or coughing, Shortness of breath, Dry cough, blueish skin (cyanosis) or lips, a Racing heart and light-headedness and feeling faint
These can sometimes heal on their own; other than that, a trained medical professional can insert a needle or a chest tube to draw the air out if the pleural space.
Tension Pneumothorax as above but this creates pressure leading the lung to collapse and cardiorespiratory compromise causing Chest pain, Sudden rapid onset of shortness of breath, Distress and rapid, laboured respirations, Cyanosis: (blue discoloration of the skin due to low blood oxygen), Tachycardia: (rapid heart rate), Hypotension: (low blood pressure), Distended neck veins: from obstructed blood return to the heart, Tracheal deviation: away from the affected side, Mediastinal shift: (the central structures of the chest are pushed to the opposite side)
A trained medical professional can insert a needle or a chest tube to draw the air out if the pleural space.
Lunchtime came around quickly again and even though I’d taken my own lunch in, I still wandered over to the café with some of the group. It wasn’t really about the food — it was about keeping up the chat, sharing laughs, and feeling part of the team. Sitting together in a different setting made it easier to talk about things outside of the course — families, jobs, and the odd story of why people had signed up for training in the first place.
By the time we headed back, I realised the café trips were becoming just as much a part of the experience as the lessons themselves. It was a chance to reset, relax, and then step back into the afternoon session with a clearer head.
After lunch we covered spinal injuries, how to recognise them, and the importance of keeping the spine stable, and learning the Log Roll and how to put a patient in the Spinal Recovery position if the patient is unresponsive.
Serious head injuries were explained, including concussion and compression, with their different signs and symptoms.
We also looked at chemical burns and how to treat them safely.
Finally, we learned about poisons, including how to manage them using the ‘3 Is’ and A method
Ingested
Inhaled
Injected
Absorbed
By the end of Day 2, I felt much more confident in casualty assessment and in dealing with a wide range of injuries, from broken bones to chest trauma, head injuries, and chemical exposure.
Day 3
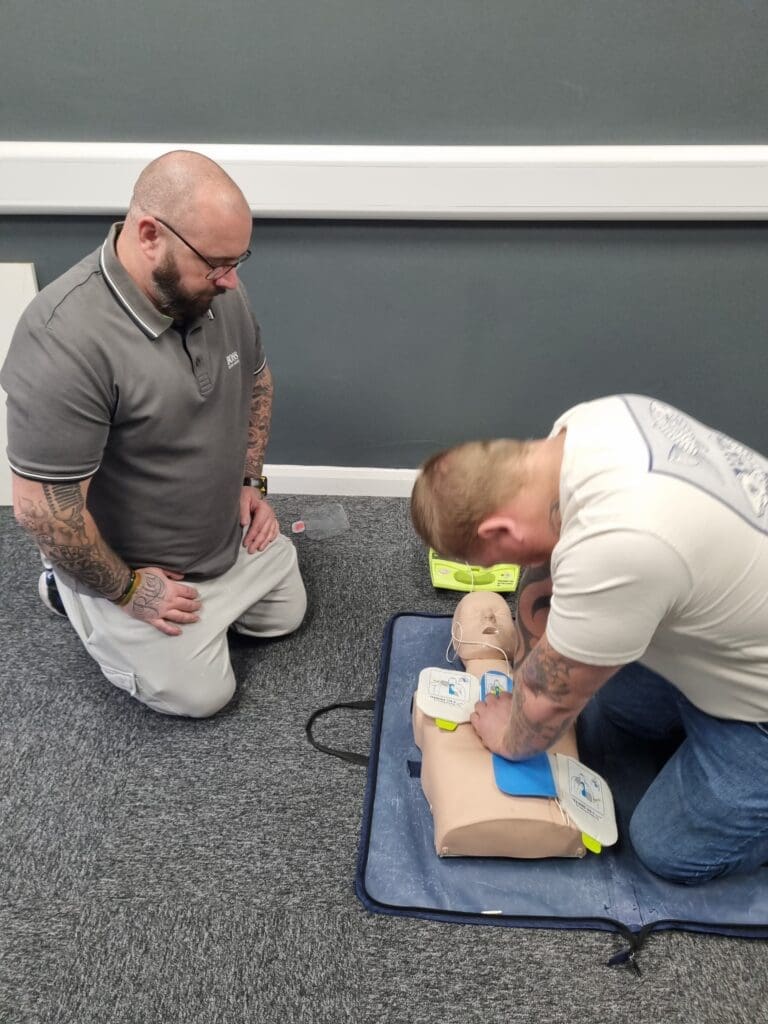
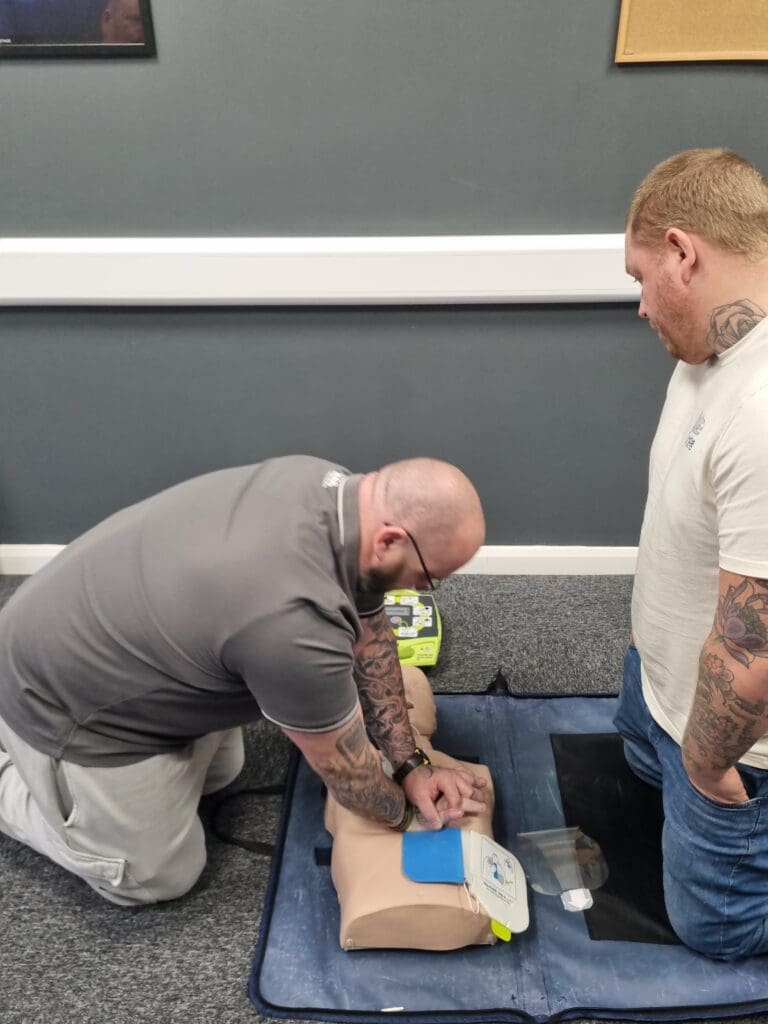
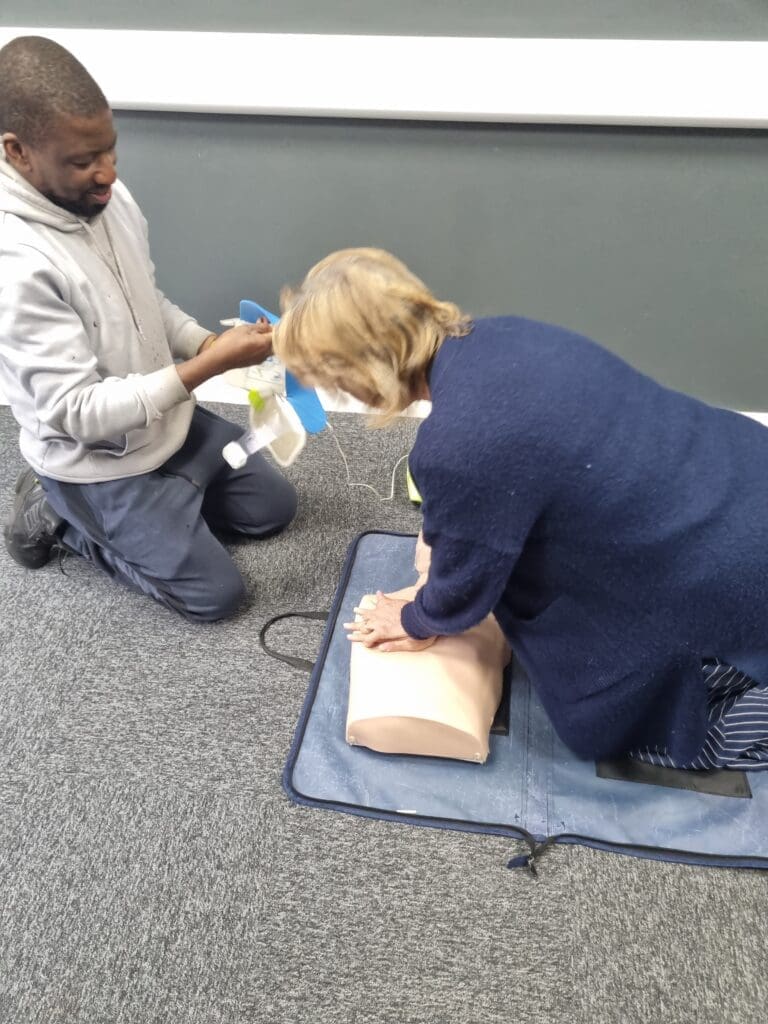
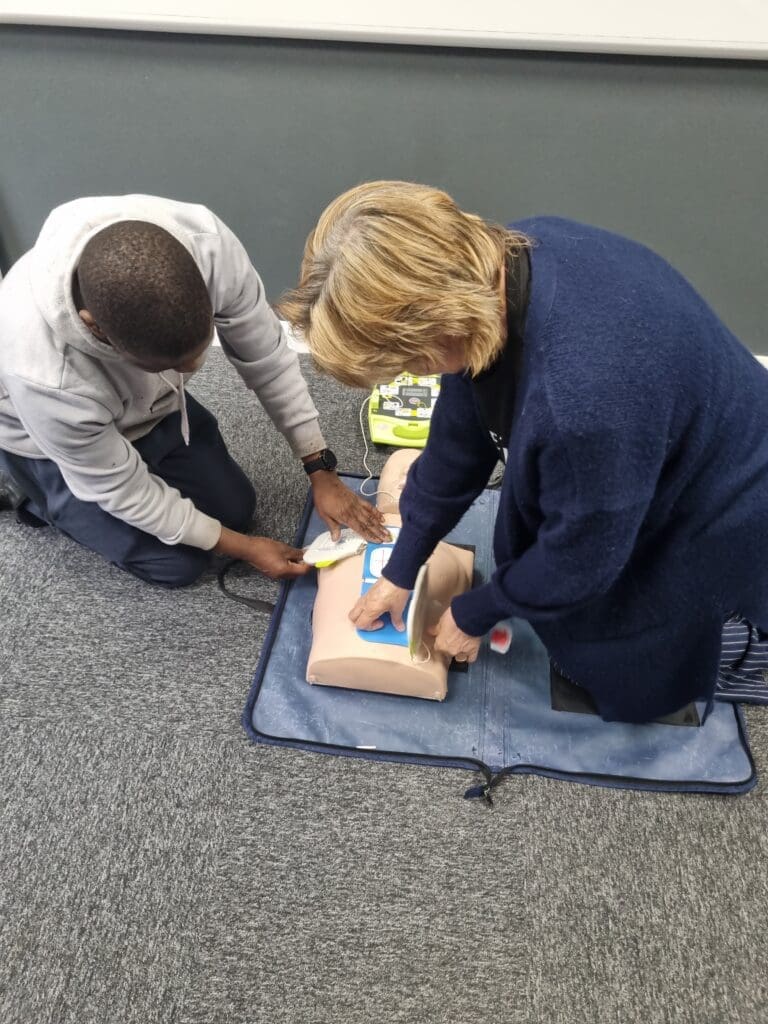
On the final day of the course, we completed the AED section. After the trainer’s demonstration, we got back into our pairs. The people who had been first aiders yesterday swapped roles and became helpers today. This meant the other half of the group had their turn using the AED, running through the prompts, and delivering those reassuringly clear instructions that make the machine so vital in an emergency.
Once everyone had practised, we shifted gears and revised everything we’d learned — but not in a dry, classroom way. The trainer surprised us with a medical version of Family Fortunes. Questions popped up about choking, burns, CPR ratios, and recovery positions, and we had to shout out the top answers. It was competitive, noisy, and full of laughter, but also a clever way of breaking down and reinforcing the key topics we’d been covering all week.
Finally, the moment arrived: the final test. But step by step, the training kicked in. Check for danger. Call for help. Start compressions. Use the AED.
The final test was 25 questions, and we needed 18 to pass. The paper covered everything — DRABC, CPR ratios, choking, bleeding control, burns, shock, recovery position, and the AED prompts. I circled answers with shaky hands, hearing the trainer’s voice in my head: “Do the basics well.”
We handed in our papers and waited. The room was unusually quiet — no chatter, just the soft rustle of test papers being sorted at the front. When Martin said, “Well done, you all passed”, the relief hit like a wave; there was a collective sigh of relief. We had all worked hard, and now the hope was that we’d walk out of the room not just with a certificate, but with the confidence to act if someone’s life ever depended on it..
A huge part of the experience was down to our fantastic trainer, Martin Sanders. His clear explanations, patience, and humour kept us all engaged and made even the trickiest topics feel achievable. He created an atmosphere where we felt comfortable making mistakes, asking questions, and learning by doing.
Thank you to everyone at Training 4 Logistics, and especially to Martin, for running these courses and giving us the chance to learn skills that can make a real difference in helping others.
“It’s not about being perfect. It’s about doing something — because doing something could save a life.”
You can see more videos on our Facebook page.